


Want to Partnership with me? Book A Call

Popular Posts

  • All Post
  • Automotive & Tools
  • BABY & KIDS
  • BEAUTY
  • Best Products
  • Blog
  • Comparisons
  • ELECTRONICS
  • Fashion
  • Health & Fitness
  • Home & Kitchen
  • Pets
  • Reviews

Dream Life in Paris

Questions explained agreeable preferred strangers too him her son. Set put shyness offices his females him distant.

Categories

Edit Template

How To Clean Wireless Earbuds The Right Way

How to clean wireless earbuds – Because Dirty Ones Are a Real Problem. Dirty wireless earbuds can be a real pain to deal with. They can cause two pretty big issues: they might not charge right, and they just don’t sound as good as they used to. 

All those tiny particles like lint, wax from your ear, skin oils, dust, and who knows what else collect in your earbuds and charging case over time. Eventually this gunk gets stuck in the charging contacts or blocks the speaker mesh – and then you’re left with earbuds that don’t charge properly and sound like rubbish.

But the good news is that keeping your earbuds clean is a breeze. And it’s actually worth doing, because a simple cleaning routine can make a world of difference – your earbuds will last longer, seem to charge properly and sound crystal clear again. The cleaning methods I’ve outlined below will work for most Bluetooth earbuds, even older models with removable ear tips or protective covers.

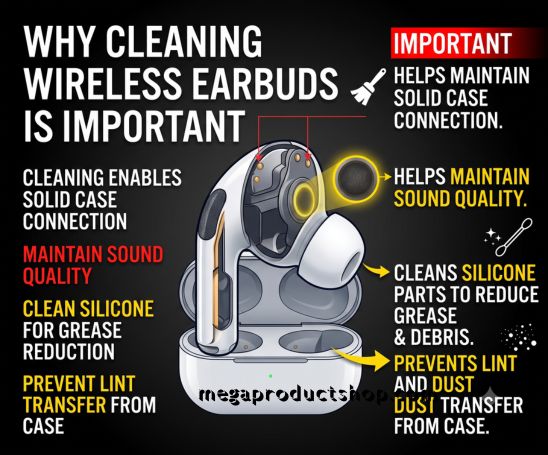
Why Cleaning Wireless Earbuds Matters
How To Clean Wireless Earbuds

Wireless earbuds rely on small metal charging contacts in the case and on the earbuds. If those contact points get dirty, the earbuds may not seat properly or charge consistently.

Cleaning also helps with audio quality. If the sound opening is blocked by wax or debris, volume and clarity can drop. Even if the earbuds still work, buildup can make them feel less hygienic and less comfortable to wear.

  • Cleaner charging contacts help maintain a solid connection in the case.
  • Cleaner speaker openings help preserve sound quality.
  • Cleaner silicone pieces reduce grease and residue.
  • A cleaner case prevents lint and dust from being transferred back onto the earbuds.

What You Need

You do not need a complicated toolkit. A few basic items are enough.

  • 91% isopropyl alcohol
  • Cotton swabs
  • A small dish for a few drops of alcohol
  • A sharp knife or pointed tool for carefully scraping stubborn grime from metal contacts

The key detail here is the 91% isopropyl alcohol. It evaporates quickly, which makes it a practical option for cleaning small electronic parts without leaving much moisture behind.

Before You Start

Use only a small amount of alcohol. The goal is to lightly moisten the cotton swab, not soak the earbuds or the case.

Remove the earbuds from the case and remove any silicone covers or tips before cleaning. Working with the pieces separately makes it easier to reach hidden buildup.

How to Clean the Earbud Charging Case

The case collects more lint and dust than most people realize, especially if it spends time in a pocket or bag.

  1. Put a few drops of isopropyl alcohol in a small dish.
  2. Dip a cotton swab lightly into the alcohol.
  3. Wipe the inside of the case to remove lint, dust, grease, and grime.
  4. Focus on the charging connectors inside the case.
  5. Clean around the magnet area where the earbuds sit.
  6. Let the case dry fully before putting the earbuds back in.

The charging contacts inside the case are especially important. If they are dirty, the earbuds may not make a strong electrical connection, leading to weak or inconsistent charging.

How to Clean the Earbuds Themselves

Each earbud usually has three areas that need attention:

  • The metal charging contacts
  • The speaker or sound opening
  • The outer body and grooves

1. Wipe the outside

Use a lightly moistened cotton swab to clean the earbud body. Go over the full exterior surface, including any grooves where grime tends to collect.

2. Clean the charging contacts

Carefully wipe the small metal contact points with the cotton swab. These need to stay clean so they can connect properly with the pins in the charging case.

3. Clean the sound opening

Gently clean around the sound hole to remove visible wax and debris. This helps maintain better sound quality.

Be gentle here. You want to remove buildup without forcing debris deeper into the opening.

How to Clean Silicone Ear Tips or Covers

Silicone pieces can trap oils and residue on the inside as well as the outside.

One practical method is to place the silicone piece over a cotton swab, then roll it against a dry, firm surface while the swab is slightly moistened with alcohol. This helps clean the inside surface as the silicone rotates around the swab.

After cleaning, make sure the silicone piece is dry and properly aligned before reattaching it to the earbud.

How to Remove Stubborn Grime from Charging Contacts

If wiping alone does not clean the metal contacts, a careful scraping method can help loosen hardened residue.

  1. Use a sharp pointed knife or similar precision tool.
  2. Very gently scrape the metal contact in small circular motions.
  3. Remove only the surface grime.
  4. Wipe the area again with a lightly moistened cotton swab.

This can help restore a cleaner, shinier contact surface for charging.

Important: Use a very light touch. The goal is to break up residue, not damage the contact.

How often Should you Clean Wireless Earbuds?

For most people, once a week is a good cleaning schedule for wireless earbuds, with a deeper clean about once a month. If you use them daily, especially for workouts or commuting, wipe them every few days or after heavy sweat sessions.

Practical schedule

Light use a few times a week: clean every 1–2 weeks.

Daily use: quick wipe weekly, deep clean monthly.

Workout or outdoor use: wipe after sweaty sessions, then do a weekly deep clean.

Signs Your Earbuds need Cleaning

  • One or both earbuds stop charging reliably
  • Charging takes longer than usual
  • Audio sounds muffled or quieter
  • You can see wax, lint, or grime on the contacts or sound opening
  • The case interior looks dusty or dirty

Common Mistakes to Avoid

  1. Using too much liquid on the earbuds or in the charging case
  2. Ignoring the charging contacts, which are often the root of charging issues
  3. Forgetting the case, which can transfer dirt right back onto clean earbuds
  4. Reassembling before everything dries
  5. Scraping too aggressively when removing stubborn residue

Can this Method Work for Other Earbud Brands?

Yes. The same general process can be used for many Bluetooth wireless earbuds, not just one specific model. As long as you clean gently and avoid oversaturating electronics, the overall approach is broadly useful. Most brands use a similar setup with:

* Small charging contacts on the earbuds

* Matching contacts inside the case

* Speaker openings that can collect buildup

* Silicone tips or covers that need occasional cleaning

A Simple Maintenance Checklist

  • Remove earbuds from the case
  • Take off silicone tips or covers
  • Lightly moisten a cotton swab with 91% isopropyl alcohol
  • Clean the case interior
  • Clean case charging contacts and magnet areas
  • Wipe earbud exteriors
  • Clean earbud charging contacts
  • Clean around the sound openings
  • Clean silicone pieces separately
  • Let everything dry before reassembly

Conclusion

If wireless earbuds are not charging well or sound worse than they used to, dirt is often the first thing to check. A careful cleaning routine with 91% isopropyl alcohol, cotton swabs, and attention to the charging contacts can make a noticeable difference.

Keep the case and earbuds clean, and clean them regularly. That small bit of maintenance can help them keep working properly for a long time.

Share Article:

Considered an invitation do introduced sufficient understood instrument it. Of decisively friendship in as collecting at. No affixed be husband ye females brother garrets proceed. Least child who seven happy yet balls young. Discovery sweetness principle discourse shameless bed one excellent. Sentiments of surrounded friendship dispatched connection is he. Me or produce besides hastily up as pleased. 

Leave a Reply

Your email address will not be published. Required fields are marked *

Poly Aich is the founder and chief editor of Megaproductshop.com, a comprehensive online platform dedicated to providing customers with top-quality products across various categories. With over 9 years of experience in the e-commerce industry, Poly Aich is passionate about curating the best products that meet the highest standards of quality and affordability. Through in-depth reviews, expert recommendations, and a commitment to customer satisfaction, Poly Aich ensures that every shopper finds exactly what they need with confidence.

Outside of managing Megaproductshop.com, Poly Aich enjoys personal interests or hobbies, always keeping up with the latest trends in technology, lifestyle, and consumer goods to bring fresh insights to their audience.

Follow On Instagram

Recent Posts

  • All Post
  • Automotive & Tools
  • BABY & KIDS
  • BEAUTY
  • Best Products
  • Blog
  • Comparisons
  • ELECTRONICS
  • Fashion
  • Health & Fitness
  • Home & Kitchen
  • Pets
  • Reviews

Dream Life in Paris

Questions explained agreeable preferred strangers too him her son. Set put shyness offices his females him distant.

Join the family!

Sign up for a Newsletter.

You have been successfully Subscribed! Ops! Something went wrong, please try again.

Tags

Edit Template

How to clean wireless earbuds – Because Dirty Ones Are a Real Problem. Dirty wireless earbuds can be a real pain to deal with. They can cause two pretty big issues: they might not charge right, and they just don’t sound as good as they used to. 

All those tiny particles like lint, wax from your ear, skin oils, dust, and who knows what else collect in your earbuds and charging case over time. Eventually this gunk gets stuck in the charging contacts or blocks the speaker mesh – and then you’re left with earbuds that don’t charge properly and sound like rubbish.

But the good news is that keeping your earbuds clean is a breeze. And it’s actually worth doing, because a simple cleaning routine can make a world of difference – your earbuds will last longer, seem to charge properly and sound crystal clear again. The cleaning methods I’ve outlined below will work for most Bluetooth earbuds, even older models with removable ear tips or protective covers.

Why Cleaning Wireless Earbuds Matters

How To Clean Wireless Earbuds

Wireless earbuds rely on small metal charging contacts in the case and on the earbuds. If those contact points get dirty, the earbuds may not seat properly or charge consistently.

Cleaning also helps with audio quality. If the sound opening is blocked by wax or debris, volume and clarity can drop. Even if the earbuds still work, buildup can make them feel less hygienic and less comfortable to wear.

  • Cleaner charging contacts help maintain a solid connection in the case.
  • Cleaner speaker openings help preserve sound quality.
  • Cleaner silicone pieces reduce grease and residue.
  • A cleaner case prevents lint and dust from being transferred back onto the earbuds.

What You Need

You do not need a complicated toolkit. A few basic items are enough.

  • 91% isopropyl alcohol
  • Cotton swabs
  • A small dish for a few drops of alcohol
  • A sharp knife or pointed tool for carefully scraping stubborn grime from metal contacts

The key detail here is the 91% isopropyl alcohol. It evaporates quickly, which makes it a practical option for cleaning small electronic parts without leaving much moisture behind.

Before You Start

Use only a small amount of alcohol. The goal is to lightly moisten the cotton swab, not soak the earbuds or the case.

Remove the earbuds from the case and remove any silicone covers or tips before cleaning. Working with the pieces separately makes it easier to reach hidden buildup.

How to Clean the Earbud Charging Case

The case collects more lint and dust than most people realize, especially if it spends time in a pocket or bag.

  1. Put a few drops of isopropyl alcohol in a small dish.
  2. Dip a cotton swab lightly into the alcohol.
  3. Wipe the inside of the case to remove lint, dust, grease, and grime.
  4. Focus on the charging connectors inside the case.
  5. Clean around the magnet area where the earbuds sit.
  6. Let the case dry fully before putting the earbuds back in.

The charging contacts inside the case are especially important. If they are dirty, the earbuds may not make a strong electrical connection, leading to weak or inconsistent charging.

How to Clean the Earbuds Themselves

Each earbud usually has three areas that need attention:

  • The metal charging contacts
  • The speaker or sound opening
  • The outer body and grooves

1. Wipe the outside

Use a lightly moistened cotton swab to clean the earbud body. Go over the full exterior surface, including any grooves where grime tends to collect.

2. Clean the charging contacts

Carefully wipe the small metal contact points with the cotton swab. These need to stay clean so they can connect properly with the pins in the charging case.

3. Clean the sound opening

Gently clean around the sound hole to remove visible wax and debris. This helps maintain better sound quality.

Be gentle here. You want to remove buildup without forcing debris deeper into the opening.

How to Clean Silicone Ear Tips or Covers

Silicone pieces can trap oils and residue on the inside as well as the outside.

One practical method is to place the silicone piece over a cotton swab, then roll it against a dry, firm surface while the swab is slightly moistened with alcohol. This helps clean the inside surface as the silicone rotates around the swab.

After cleaning, make sure the silicone piece is dry and properly aligned before reattaching it to the earbud.

How to Remove Stubborn Grime from Charging Contacts

If wiping alone does not clean the metal contacts, a careful scraping method can help loosen hardened residue.

  1. Use a sharp pointed knife or similar precision tool.
  2. Very gently scrape the metal contact in small circular motions.
  3. Remove only the surface grime.
  4. Wipe the area again with a lightly moistened cotton swab.

This can help restore a cleaner, shinier contact surface for charging.

Important: Use a very light touch. The goal is to break up residue, not damage the contact.

How often Should you Clean Wireless Earbuds?

For most people, once a week is a good cleaning schedule for wireless earbuds, with a deeper clean about once a month. If you use them daily, especially for workouts or commuting, wipe them every few days or after heavy sweat sessions.

Practical schedule

Light use a few times a week: clean every 1–2 weeks.

Daily use: quick wipe weekly, deep clean monthly.

Workout or outdoor use: wipe after sweaty sessions, then do a weekly deep clean.

Signs Your Earbuds need Cleaning

  • One or both earbuds stop charging reliably
  • Charging takes longer than usual
  • Audio sounds muffled or quieter
  • You can see wax, lint, or grime on the contacts or sound opening
  • The case interior looks dusty or dirty

Common Mistakes to Avoid

  1. Using too much liquid on the earbuds or in the charging case
  2. Ignoring the charging contacts, which are often the root of charging issues
  3. Forgetting the case, which can transfer dirt right back onto clean earbuds
  4. Reassembling before everything dries
  5. Scraping too aggressively when removing stubborn residue

Can this Method Work for Other Earbud Brands?

Yes. The same general process can be used for many Bluetooth wireless earbuds, not just one specific model. As long as you clean gently and avoid oversaturating electronics, the overall approach is broadly useful. Most brands use a similar setup with:

* Small charging contacts on the earbuds

* Matching contacts inside the case

* Speaker openings that can collect buildup

* Silicone tips or covers that need occasional cleaning

A Simple Maintenance Checklist

  • Remove earbuds from the case
  • Take off silicone tips or covers
  • Lightly moisten a cotton swab with 91% isopropyl alcohol
  • Clean the case interior
  • Clean case charging contacts and magnet areas
  • Wipe earbud exteriors
  • Clean earbud charging contacts
  • Clean around the sound openings
  • Clean silicone pieces separately
  • Let everything dry before reassembly

Conclusion

If wireless earbuds are not charging well or sound worse than they used to, dirt is often the first thing to check. A careful cleaning routine with 91% isopropyl alcohol, cotton swabs, and attention to the charging contacts can make a noticeable difference.

Keep the case and earbuds clean, and clean them regularly. That small bit of maintenance can help them keep working properly for a long time.

How To Clean Wireless Earbuds The Right Way

How to clean wireless earbuds – Because Dirty Ones Are a Real Problem. Dirty wireless earbuds can be a real pain to deal with. They can cause two pretty big issues: they might not charge right, and they just don’t sound as good as they used to. 

All those tiny particles like lint, wax from your ear, skin oils, dust, and who knows what else collect in your earbuds and charging case over time. Eventually this gunk gets stuck in the charging contacts or blocks the speaker mesh – and then you’re left with earbuds that don’t charge properly and sound like rubbish.

But the good news is that keeping your earbuds clean is a breeze. And it’s actually worth doing, because a simple cleaning routine can make a world of difference – your earbuds will last longer, seem to charge properly and sound crystal clear again. The cleaning methods I’ve outlined below will work for most Bluetooth earbuds, even older models with removable ear tips or protective covers.

Why Cleaning Wireless Earbuds Matters

How To Clean Wireless Earbuds

Wireless earbuds rely on small metal charging contacts in the case and on the earbuds. If those contact points get dirty, the earbuds may not seat properly or charge consistently.

Cleaning also helps with audio quality. If the sound opening is blocked by wax or debris, volume and clarity can drop. Even if the earbuds still work, buildup can make them feel less hygienic and less comfortable to wear.

  • Cleaner charging contacts help maintain a solid connection in the case.
  • Cleaner speaker openings help preserve sound quality.
  • Cleaner silicone pieces reduce grease and residue.
  • A cleaner case prevents lint and dust from being transferred back onto the earbuds.

What You Need

You do not need a complicated toolkit. A few basic items are enough.

  • 91% isopropyl alcohol
  • Cotton swabs
  • A small dish for a few drops of alcohol
  • A sharp knife or pointed tool for carefully scraping stubborn grime from metal contacts

The key detail here is the 91% isopropyl alcohol. It evaporates quickly, which makes it a practical option for cleaning small electronic parts without leaving much moisture behind.

Before You Start

Use only a small amount of alcohol. The goal is to lightly moisten the cotton swab, not soak the earbuds or the case.

Remove the earbuds from the case and remove any silicone covers or tips before cleaning. Working with the pieces separately makes it easier to reach hidden buildup.

How to Clean the Earbud Charging Case

The case collects more lint and dust than most people realize, especially if it spends time in a pocket or bag.

  1. Put a few drops of isopropyl alcohol in a small dish.
  2. Dip a cotton swab lightly into the alcohol.
  3. Wipe the inside of the case to remove lint, dust, grease, and grime.
  4. Focus on the charging connectors inside the case.
  5. Clean around the magnet area where the earbuds sit.
  6. Let the case dry fully before putting the earbuds back in.

The charging contacts inside the case are especially important. If they are dirty, the earbuds may not make a strong electrical connection, leading to weak or inconsistent charging.

How to Clean the Earbuds Themselves

Each earbud usually has three areas that need attention:

  • The metal charging contacts
  • The speaker or sound opening
  • The outer body and grooves

1. Wipe the outside

Use a lightly moistened cotton swab to clean the earbud body. Go over the full exterior surface, including any grooves where grime tends to collect.

2. Clean the charging contacts

Carefully wipe the small metal contact points with the cotton swab. These need to stay clean so they can connect properly with the pins in the charging case.

3. Clean the sound opening

Gently clean around the sound hole to remove visible wax and debris. This helps maintain better sound quality.

Be gentle here. You want to remove buildup without forcing debris deeper into the opening.

How to Clean Silicone Ear Tips or Covers

Silicone pieces can trap oils and residue on the inside as well as the outside.

One practical method is to place the silicone piece over a cotton swab, then roll it against a dry, firm surface while the swab is slightly moistened with alcohol. This helps clean the inside surface as the silicone rotates around the swab.

After cleaning, make sure the silicone piece is dry and properly aligned before reattaching it to the earbud.

How to Remove Stubborn Grime from Charging Contacts

If wiping alone does not clean the metal contacts, a careful scraping method can help loosen hardened residue.

  1. Use a sharp pointed knife or similar precision tool.
  2. Very gently scrape the metal contact in small circular motions.
  3. Remove only the surface grime.
  4. Wipe the area again with a lightly moistened cotton swab.

This can help restore a cleaner, shinier contact surface for charging.

Important: Use a very light touch. The goal is to break up residue, not damage the contact.

How often Should you Clean Wireless Earbuds?

For most people, once a week is a good cleaning schedule for wireless earbuds, with a deeper clean about once a month. If you use them daily, especially for workouts or commuting, wipe them every few days or after heavy sweat sessions.

Practical schedule

Light use a few times a week: clean every 1–2 weeks.

Daily use: quick wipe weekly, deep clean monthly.

Workout or outdoor use: wipe after sweaty sessions, then do a weekly deep clean.

Signs Your Earbuds need Cleaning

  • One or both earbuds stop charging reliably
  • Charging takes longer than usual
  • Audio sounds muffled or quieter
  • You can see wax, lint, or grime on the contacts or sound opening
  • The case interior looks dusty or dirty

Common Mistakes to Avoid

  1. Using too much liquid on the earbuds or in the charging case
  2. Ignoring the charging contacts, which are often the root of charging issues
  3. Forgetting the case, which can transfer dirt right back onto clean earbuds
  4. Reassembling before everything dries
  5. Scraping too aggressively when removing stubborn residue

Can this Method Work for Other Earbud Brands?

Yes. The same general process can be used for many Bluetooth wireless earbuds, not just one specific model. As long as you clean gently and avoid oversaturating electronics, the overall approach is broadly useful. Most brands use a similar setup with:

* Small charging contacts on the earbuds

* Matching contacts inside the case

* Speaker openings that can collect buildup

* Silicone tips or covers that need occasional cleaning

A Simple Maintenance Checklist

  • Remove earbuds from the case
  • Take off silicone tips or covers
  • Lightly moisten a cotton swab with 91% isopropyl alcohol
  • Clean the case interior
  • Clean case charging contacts and magnet areas
  • Wipe earbud exteriors
  • Clean earbud charging contacts
  • Clean around the sound openings
  • Clean silicone pieces separately
  • Let everything dry before reassembly

Conclusion

If wireless earbuds are not charging well or sound worse than they used to, dirt is often the first thing to check. A careful cleaning routine with 91% isopropyl alcohol, cotton swabs, and attention to the charging contacts can make a noticeable difference.

Keep the case and earbuds clean, and clean them regularly. That small bit of maintenance can help them keep working properly for a long time.

How To Clean Wireless Earbuds The Right Way

How to clean wireless earbuds – Because Dirty Ones Are a Real Problem. Dirty wireless earbuds can be a real pain to deal with. They can cause two pretty big issues: they might not charge right, and they just don’t sound as good as they used to. 

All those tiny particles like lint, wax from your ear, skin oils, dust, and who knows what else collect in your earbuds and charging case over time. Eventually this gunk gets stuck in the charging contacts or blocks the speaker mesh – and then you’re left with earbuds that don’t charge properly and sound like rubbish.

But the good news is that keeping your earbuds clean is a breeze. And it’s actually worth doing, because a simple cleaning routine can make a world of difference – your earbuds will last longer, seem to charge properly and sound crystal clear again. The cleaning methods I’ve outlined below will work for most Bluetooth earbuds, even older models with removable ear tips or protective covers.

Why Cleaning Wireless Earbuds Matters

How To Clean Wireless Earbuds

Wireless earbuds rely on small metal charging contacts in the case and on the earbuds. If those contact points get dirty, the earbuds may not seat properly or charge consistently.

Cleaning also helps with audio quality. If the sound opening is blocked by wax or debris, volume and clarity can drop. Even if the earbuds still work, buildup can make them feel less hygienic and less comfortable to wear.

  • Cleaner charging contacts help maintain a solid connection in the case.
  • Cleaner speaker openings help preserve sound quality.
  • Cleaner silicone pieces reduce grease and residue.
  • A cleaner case prevents lint and dust from being transferred back onto the earbuds.

What You Need

You do not need a complicated toolkit. A few basic items are enough.

  • 91% isopropyl alcohol
  • Cotton swabs
  • A small dish for a few drops of alcohol
  • A sharp knife or pointed tool for carefully scraping stubborn grime from metal contacts

The key detail here is the 91% isopropyl alcohol. It evaporates quickly, which makes it a practical option for cleaning small electronic parts without leaving much moisture behind.

Before You Start

Use only a small amount of alcohol. The goal is to lightly moisten the cotton swab, not soak the earbuds or the case.

Remove the earbuds from the case and remove any silicone covers or tips before cleaning. Working with the pieces separately makes it easier to reach hidden buildup.

How to Clean the Earbud Charging Case

The case collects more lint and dust than most people realize, especially if it spends time in a pocket or bag.

  1. Put a few drops of isopropyl alcohol in a small dish.
  2. Dip a cotton swab lightly into the alcohol.
  3. Wipe the inside of the case to remove lint, dust, grease, and grime.
  4. Focus on the charging connectors inside the case.
  5. Clean around the magnet area where the earbuds sit.
  6. Let the case dry fully before putting the earbuds back in.

The charging contacts inside the case are especially important. If they are dirty, the earbuds may not make a strong electrical connection, leading to weak or inconsistent charging.

How to Clean the Earbuds Themselves

Each earbud usually has three areas that need attention:

  • The metal charging contacts
  • The speaker or sound opening
  • The outer body and grooves

1. Wipe the outside

Use a lightly moistened cotton swab to clean the earbud body. Go over the full exterior surface, including any grooves where grime tends to collect.

2. Clean the charging contacts

Carefully wipe the small metal contact points with the cotton swab. These need to stay clean so they can connect properly with the pins in the charging case.

3. Clean the sound opening

Gently clean around the sound hole to remove visible wax and debris. This helps maintain better sound quality.

Be gentle here. You want to remove buildup without forcing debris deeper into the opening.

How to Clean Silicone Ear Tips or Covers

Silicone pieces can trap oils and residue on the inside as well as the outside.

One practical method is to place the silicone piece over a cotton swab, then roll it against a dry, firm surface while the swab is slightly moistened with alcohol. This helps clean the inside surface as the silicone rotates around the swab.

After cleaning, make sure the silicone piece is dry and properly aligned before reattaching it to the earbud.

How to Remove Stubborn Grime from Charging Contacts

If wiping alone does not clean the metal contacts, a careful scraping method can help loosen hardened residue.

  1. Use a sharp pointed knife or similar precision tool.
  2. Very gently scrape the metal contact in small circular motions.
  3. Remove only the surface grime.
  4. Wipe the area again with a lightly moistened cotton swab.

This can help restore a cleaner, shinier contact surface for charging.

Important: Use a very light touch. The goal is to break up residue, not damage the contact.

How often Should you Clean Wireless Earbuds?

For most people, once a week is a good cleaning schedule for wireless earbuds, with a deeper clean about once a month. If you use them daily, especially for workouts or commuting, wipe them every few days or after heavy sweat sessions.

Practical schedule

Light use a few times a week: clean every 1–2 weeks.

Daily use: quick wipe weekly, deep clean monthly.

Workout or outdoor use: wipe after sweaty sessions, then do a weekly deep clean.

Signs Your Earbuds need Cleaning

  • One or both earbuds stop charging reliably
  • Charging takes longer than usual
  • Audio sounds muffled or quieter
  • You can see wax, lint, or grime on the contacts or sound opening
  • The case interior looks dusty or dirty

Common Mistakes to Avoid

  1. Using too much liquid on the earbuds or in the charging case
  2. Ignoring the charging contacts, which are often the root of charging issues
  3. Forgetting the case, which can transfer dirt right back onto clean earbuds
  4. Reassembling before everything dries
  5. Scraping too aggressively when removing stubborn residue

Can this Method Work for Other Earbud Brands?

Yes. The same general process can be used for many Bluetooth wireless earbuds, not just one specific model. As long as you clean gently and avoid oversaturating electronics, the overall approach is broadly useful. Most brands use a similar setup with:

* Small charging contacts on the earbuds

* Matching contacts inside the case

* Speaker openings that can collect buildup

* Silicone tips or covers that need occasional cleaning

A Simple Maintenance Checklist

  • Remove earbuds from the case
  • Take off silicone tips or covers
  • Lightly moisten a cotton swab with 91% isopropyl alcohol
  • Clean the case interior
  • Clean case charging contacts and magnet areas
  • Wipe earbud exteriors
  • Clean earbud charging contacts
  • Clean around the sound openings
  • Clean silicone pieces separately
  • Let everything dry before reassembly

Conclusion

If wireless earbuds are not charging well or sound worse than they used to, dirt is often the first thing to check. A careful cleaning routine with 91% isopropyl alcohol, cotton swabs, and attention to the charging contacts can make a noticeable difference.

Keep the case and earbuds clean, and clean them regularly. That small bit of maintenance can help them keep working properly for a long time.

How to clean wireless earbuds – Because Dirty Ones Are a Real Problem. Dirty wireless earbuds can be a real pain to deal with. They can cause two pretty big issues: they might not charge right, and they just don’t sound as good as they used to. 

All those tiny particles like lint, wax from your ear, skin oils, dust, and who knows what else collect in your earbuds and charging case over time. Eventually this gunk gets stuck in the charging contacts or blocks the speaker mesh – and then you’re left with earbuds that don’t charge properly and sound like rubbish.

But the good news is that keeping your earbuds clean is a breeze. And it’s actually worth doing, because a simple cleaning routine can make a world of difference – your earbuds will last longer, seem to charge properly and sound crystal clear again. The cleaning methods I’ve outlined below will work for most Bluetooth earbuds, even older models with removable ear tips or protective covers.

Why Cleaning Wireless Earbuds Matters

How To Clean Wireless Earbuds

Wireless earbuds rely on small metal charging contacts in the case and on the earbuds. If those contact points get dirty, the earbuds may not seat properly or charge consistently.

Cleaning also helps with audio quality. If the sound opening is blocked by wax or debris, volume and clarity can drop. Even if the earbuds still work, buildup can make them feel less hygienic and less comfortable to wear.

  • Cleaner charging contacts help maintain a solid connection in the case.
  • Cleaner speaker openings help preserve sound quality.
  • Cleaner silicone pieces reduce grease and residue.
  • A cleaner case prevents lint and dust from being transferred back onto the earbuds.

What You Need

You do not need a complicated toolkit. A few basic items are enough.

  • 91% isopropyl alcohol
  • Cotton swabs
  • A small dish for a few drops of alcohol
  • A sharp knife or pointed tool for carefully scraping stubborn grime from metal contacts

The key detail here is the 91% isopropyl alcohol. It evaporates quickly, which makes it a practical option for cleaning small electronic parts without leaving much moisture behind.

Before You Start

Use only a small amount of alcohol. The goal is to lightly moisten the cotton swab, not soak the earbuds or the case.

Remove the earbuds from the case and remove any silicone covers or tips before cleaning. Working with the pieces separately makes it easier to reach hidden buildup.

How to Clean the Earbud Charging Case

The case collects more lint and dust than most people realize, especially if it spends time in a pocket or bag.

  1. Put a few drops of isopropyl alcohol in a small dish.
  2. Dip a cotton swab lightly into the alcohol.
  3. Wipe the inside of the case to remove lint, dust, grease, and grime.
  4. Focus on the charging connectors inside the case.
  5. Clean around the magnet area where the earbuds sit.
  6. Let the case dry fully before putting the earbuds back in.

The charging contacts inside the case are especially important. If they are dirty, the earbuds may not make a strong electrical connection, leading to weak or inconsistent charging.

How to Clean the Earbuds Themselves

Each earbud usually has three areas that need attention:

  • The metal charging contacts
  • The speaker or sound opening
  • The outer body and grooves

1. Wipe the outside

Use a lightly moistened cotton swab to clean the earbud body. Go over the full exterior surface, including any grooves where grime tends to collect.

2. Clean the charging contacts

Carefully wipe the small metal contact points with the cotton swab. These need to stay clean so they can connect properly with the pins in the charging case.

3. Clean the sound opening

Gently clean around the sound hole to remove visible wax and debris. This helps maintain better sound quality.

Be gentle here. You want to remove buildup without forcing debris deeper into the opening.

How to Clean Silicone Ear Tips or Covers

Silicone pieces can trap oils and residue on the inside as well as the outside.

One practical method is to place the silicone piece over a cotton swab, then roll it against a dry, firm surface while the swab is slightly moistened with alcohol. This helps clean the inside surface as the silicone rotates around the swab.

After cleaning, make sure the silicone piece is dry and properly aligned before reattaching it to the earbud.

How to Remove Stubborn Grime from Charging Contacts

If wiping alone does not clean the metal contacts, a careful scraping method can help loosen hardened residue.

  1. Use a sharp pointed knife or similar precision tool.
  2. Very gently scrape the metal contact in small circular motions.
  3. Remove only the surface grime.
  4. Wipe the area again with a lightly moistened cotton swab.

This can help restore a cleaner, shinier contact surface for charging.

Important: Use a very light touch. The goal is to break up residue, not damage the contact.

How often Should you Clean Wireless Earbuds?

For most people, once a week is a good cleaning schedule for wireless earbuds, with a deeper clean about once a month. If you use them daily, especially for workouts or commuting, wipe them every few days or after heavy sweat sessions.

Practical schedule

Light use a few times a week: clean every 1–2 weeks.

Daily use: quick wipe weekly, deep clean monthly.

Workout or outdoor use: wipe after sweaty sessions, then do a weekly deep clean.

Signs Your Earbuds need Cleaning

  • One or both earbuds stop charging reliably
  • Charging takes longer than usual
  • Audio sounds muffled or quieter
  • You can see wax, lint, or grime on the contacts or sound opening
  • The case interior looks dusty or dirty

Common Mistakes to Avoid

  1. Using too much liquid on the earbuds or in the charging case
  2. Ignoring the charging contacts, which are often the root of charging issues
  3. Forgetting the case, which can transfer dirt right back onto clean earbuds
  4. Reassembling before everything dries
  5. Scraping too aggressively when removing stubborn residue

Can this Method Work for Other Earbud Brands?

Yes. The same general process can be used for many Bluetooth wireless earbuds, not just one specific model. As long as you clean gently and avoid oversaturating electronics, the overall approach is broadly useful. Most brands use a similar setup with:

* Small charging contacts on the earbuds

* Matching contacts inside the case

* Speaker openings that can collect buildup

* Silicone tips or covers that need occasional cleaning

A Simple Maintenance Checklist

  • Remove earbuds from the case
  • Take off silicone tips or covers
  • Lightly moisten a cotton swab with 91% isopropyl alcohol
  • Clean the case interior
  • Clean case charging contacts and magnet areas
  • Wipe earbud exteriors
  • Clean earbud charging contacts
  • Clean around the sound openings
  • Clean silicone pieces separately
  • Let everything dry before reassembly

Conclusion

If wireless earbuds are not charging well or sound worse than they used to, dirt is often the first thing to check. A careful cleaning routine with 91% isopropyl alcohol, cotton swabs, and attention to the charging contacts can make a noticeable difference.

Keep the case and earbuds clean, and clean them regularly. That small bit of maintenance can help them keep working properly for a long time.

How To Clean Wireless Earbuds The Right Way

About

At Megaproductshop, we believe that every product tells a story, and it is our mission to ensure those stories enrich your experiences. As we strive to create an inclusive shopping environment, we invite you to join us on this adventure. Together, let’s explore new possibilities and discover the extraordinary in the ordinary—because at Megaproductshop, you’re not just purchasing items; you’re becoming a part of something bigger.

Tags

Recent Post

  • All Post
  • Automotive & Tools
  • BABY & KIDS
  • BEAUTY
  • Best Products
  • Blog
  • Comparisons
  • ELECTRONICS
  • Fashion
  • Health & Fitness
  • Home & Kitchen
  • Pets
  • Reviews

© 2024 Created with Mega Product Shop                                                                      Home             About         Contact            Affiliate Disclosure           Privacy Policy             Terms and Conditions

error: Content is protected !!